
Height Maps
This tutorial shows the heightmaps in a A:M scenes and how to prepare them in Photoshop.
Requirements:
- A:M 12.0 or newer (I used A:M 13.0).
- You can of course use older versions of A:M with some limitations too.
- Photoshop or a equal 2d-program
- Basic Knowlegde of the programs
- The Normal-Map-Plugin for Photoshop or an equal software
Download Normal-Map-Plugin for Photoshop
A heightmap is an umbrella term of Bump-, Normal- and Displacement-Maps.
With heightmaps you are able to refine a geometry with a higher detail-level without using more patches.
You can for example make a face older by adding crinkles without modeling them or you can make a whole brickwall without one additional patch.
The difference between Bump-, Normal- and Displacement-Maps will be explained in this tutorial.
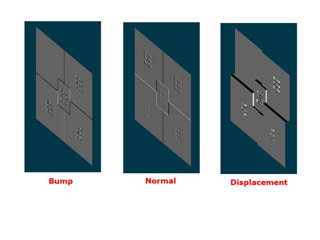
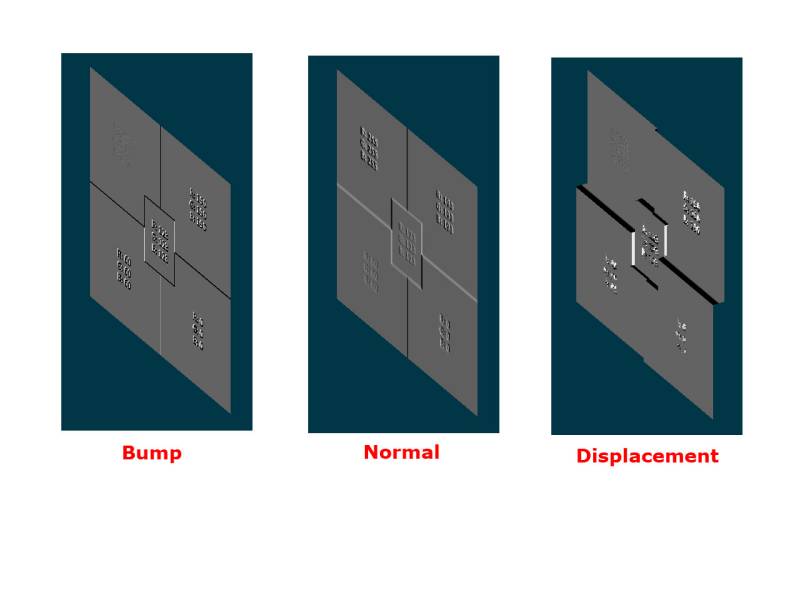
The three Map-Types
On the left you can see a bump-map on a patch-grid. In the middle you can see a Normal-map and on the right a displacement-map on the same grid.

The used patch-grid
When A:M has started you should open the ProjectWorkSpace(PWS), if it is not open already. You can activate it at View > ProjectWorkSpace.
At Tools > Options you can go to the tab global and set two additional things: Show advanced properties and Show Property Triangle.
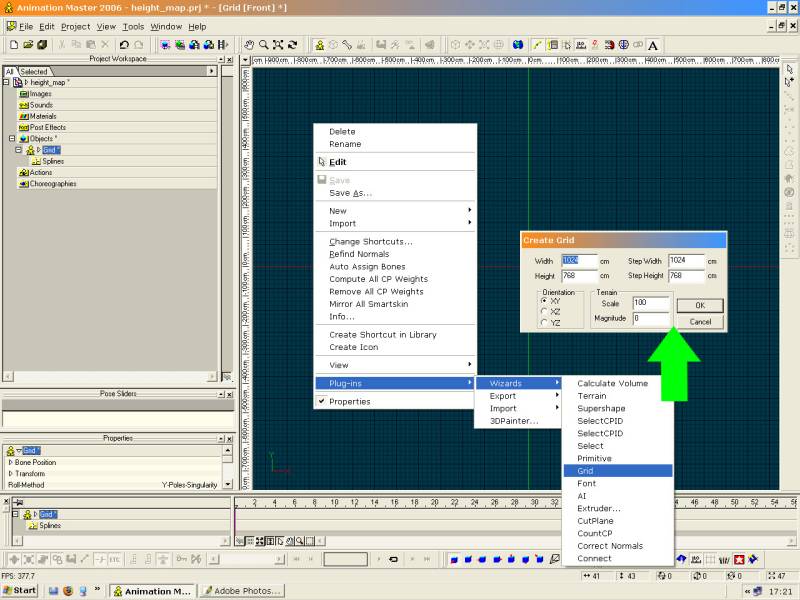
Of course you have to create a geometry before you can apply a map to it. The easiest way for this tutorial is to use the Grid-Wizard.
Make a new model by doppel-clicking on the folder objects in your PWS.
Use the right mousebutton in the opening modeling-window and choose Plugins > Wizard > Grid.
On the following image you will find well suited settings for the texture/map-size, which we want to create.
Zoom the grid that it is visible.
Bump- and Displacement-Map
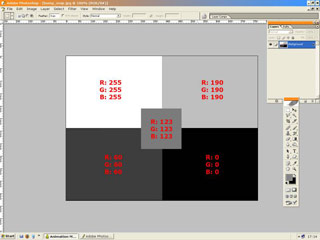
Bump- and Displacement-Maps are interpreted in a different way be the 3d-software, but the maps are the same: Greyscale-images.
The brightness of the grey will handle the height in the rendering.
The default-value(R:128, G:128, B:128) will be the basic for no height-effect. It is the mean sea level.
Darker parts will be deeper than the mean sea level, brighter once will be higher.
I used Photoshop to create this texture which will be used in the following tutorial.
It has a 1024px x 768 px big. That means that 1px represents 1cm of our grid.
This texture can be saved as a *.jpeg at 100% quality.
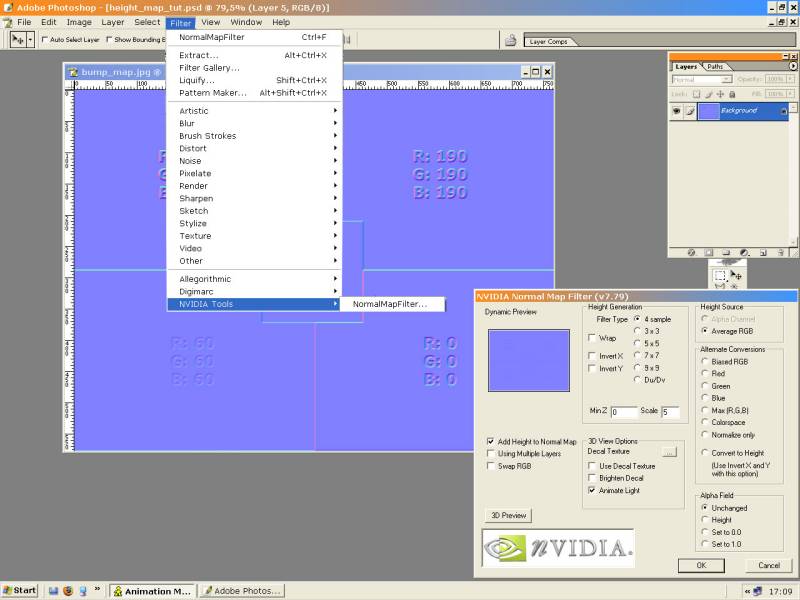

The normal map
The Normal-Map in difference to the bump/displacement-map is not a greyscale-image. It is a color image which is much more complex to create.
I would not try to make this by hand. You should use the Photoshop-Plugin of Nvidia, which can make from a greyscale-image.
A normal-map has the advantage over the bump-map, that the lights will take account, without increasing the rendertimes to much. A displacement-map will make a better look, but will although render much longer.
You can save the texture as a *.jpeg at 100% quality.
Applying the texture:
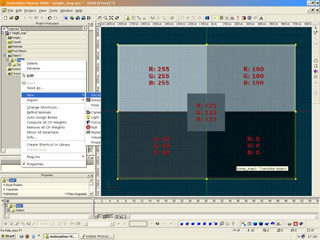
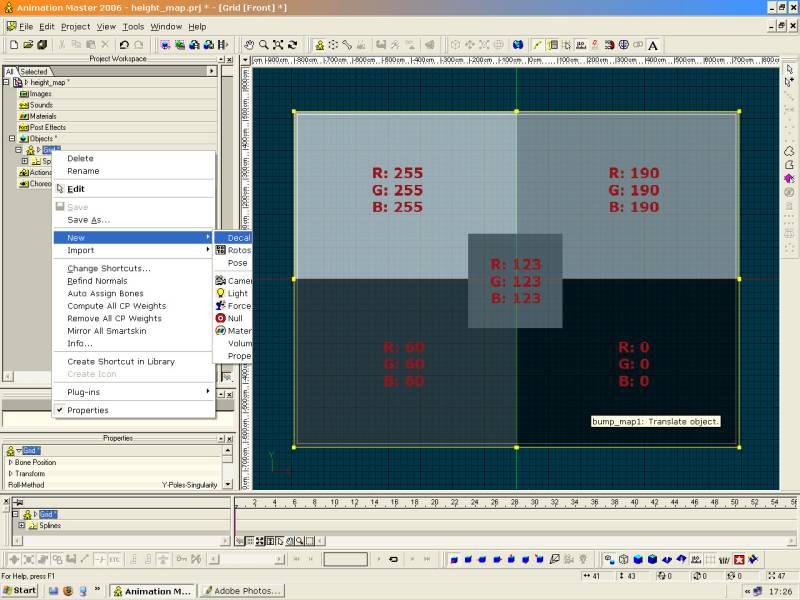
You created all of the textures. Now you have to apply them to the geometry. This can be done by a decal.
Use your right-mouse-button on the model-icon in the PWS and click on New > Decal. There will be a option-window where we use Other...
Now the texture should be transparent and with a yellow border in the model-window. Now you need to scale the texture. Use the yellow handlers and keep the ratio as it is by using the shiftkey while scaling.
With a double-click or right-mouse-button > Apply to apply the decal.
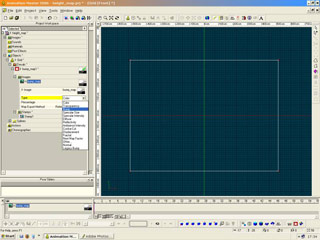
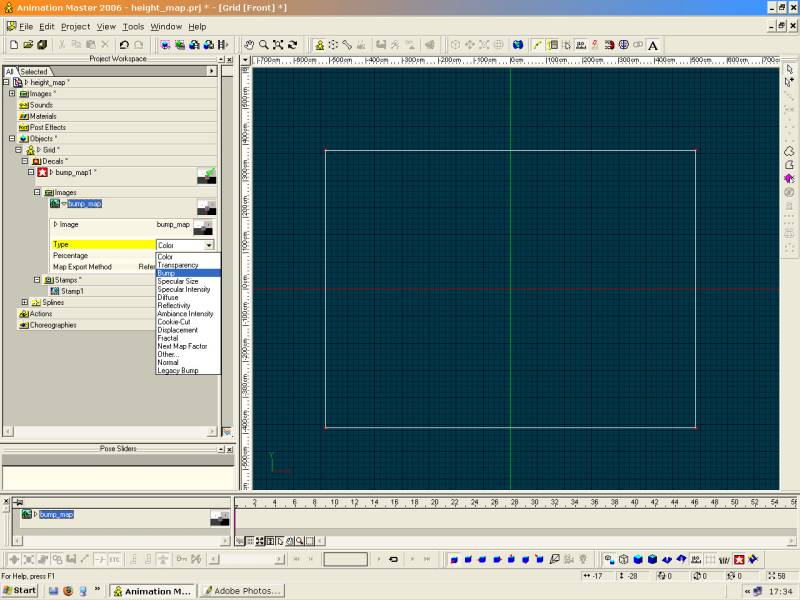
Change the Map-Type and apply a new image
The default map-type will be Color. To change this, use the properties in the PWS and set the map-type Bump.
That would be enough but we want to compare different map-types.
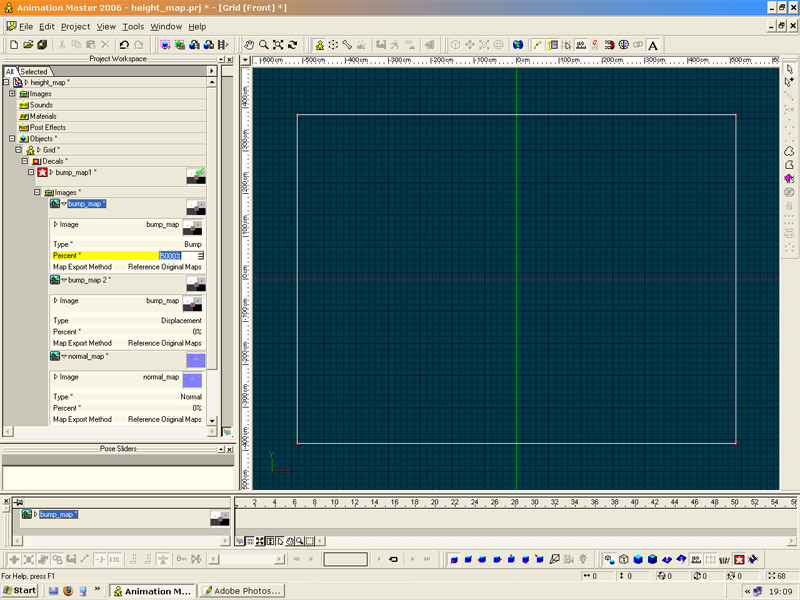
Now you can make a new decal like we did it before or you can just apply a new image to the existent decal. This is well suited, because our texture needs to be at the same spot.
Just use the right-mouse-button on the image-folder under the decal and click on Add Image > Other. Now search for the right image and change the map-type to Displacement.
Repeat this procedure for the Normal-Map.
Showing only one map
When you render now, you will see all maps above eachother. That will not help anything.
To only see one map at a time, you can now change the per cent-value of one image to for example 5000% and all others to 0%. If you use a normal-map you can use a smaller value.
Now repeat this with every map to see the differences.
The differences
The difference can best be seen in the view bird:
- The bump-map will only fake a height and will look worse the more the view-angle is away from 90 degress.
- The normal-map is alike, but looks a bit better because the lighteffects like specularity will be interpreted.
- The displacement-map will not fake anything. It manipulates the geometry to be higher or lower and should work for any degree of view.
It depends on the case:
If you are far away and just want to add some details, a bump-map is most often enough.
If you are more near to near you can use a normal-map for details which are not very pronounced.
If you need very pronounced details and the object will be quite near or you make flythroughs with your camera, Displacementmaps will be the best.
I hope the tutorial was helpful. If you have any questions, please contact me a mail with this mail form.